How to Add a Message?
A brief tutorial for how to create push notifications to send to the Quiltt mobile app.
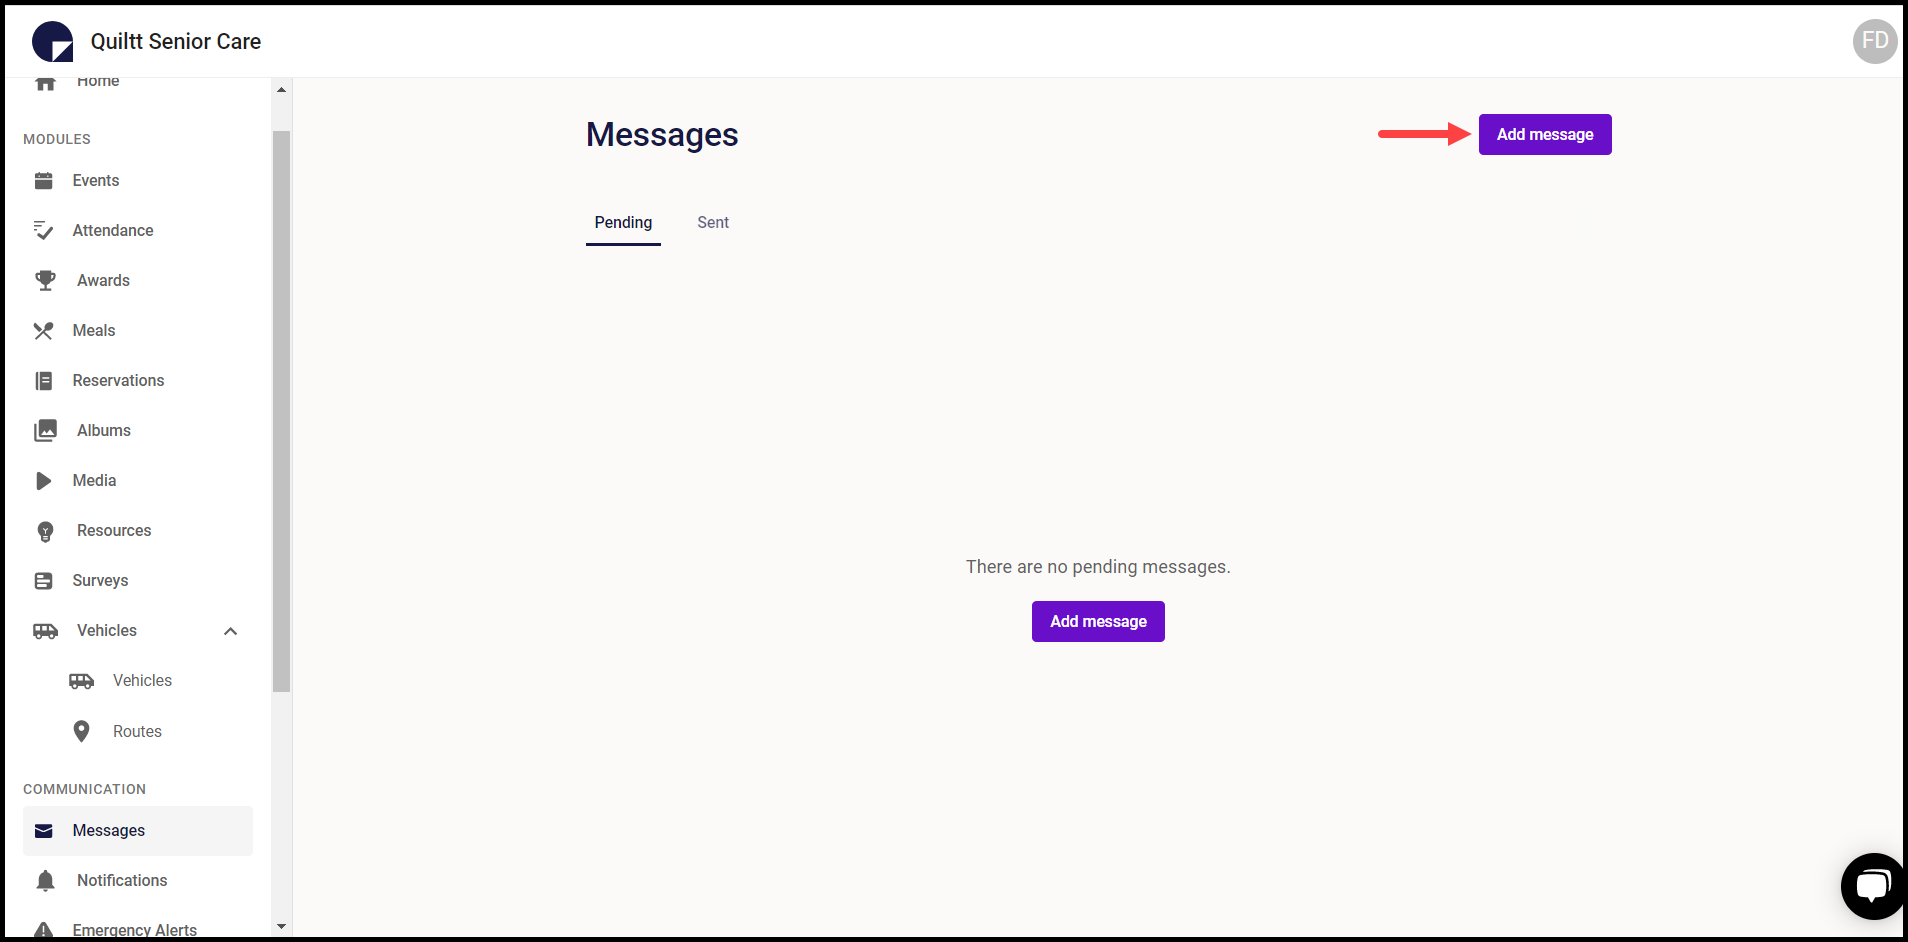
Quiltt Dashboard > Left-hand Menu > Messages
1. Follow the above-mentioned workflow to land on the Messages screen.
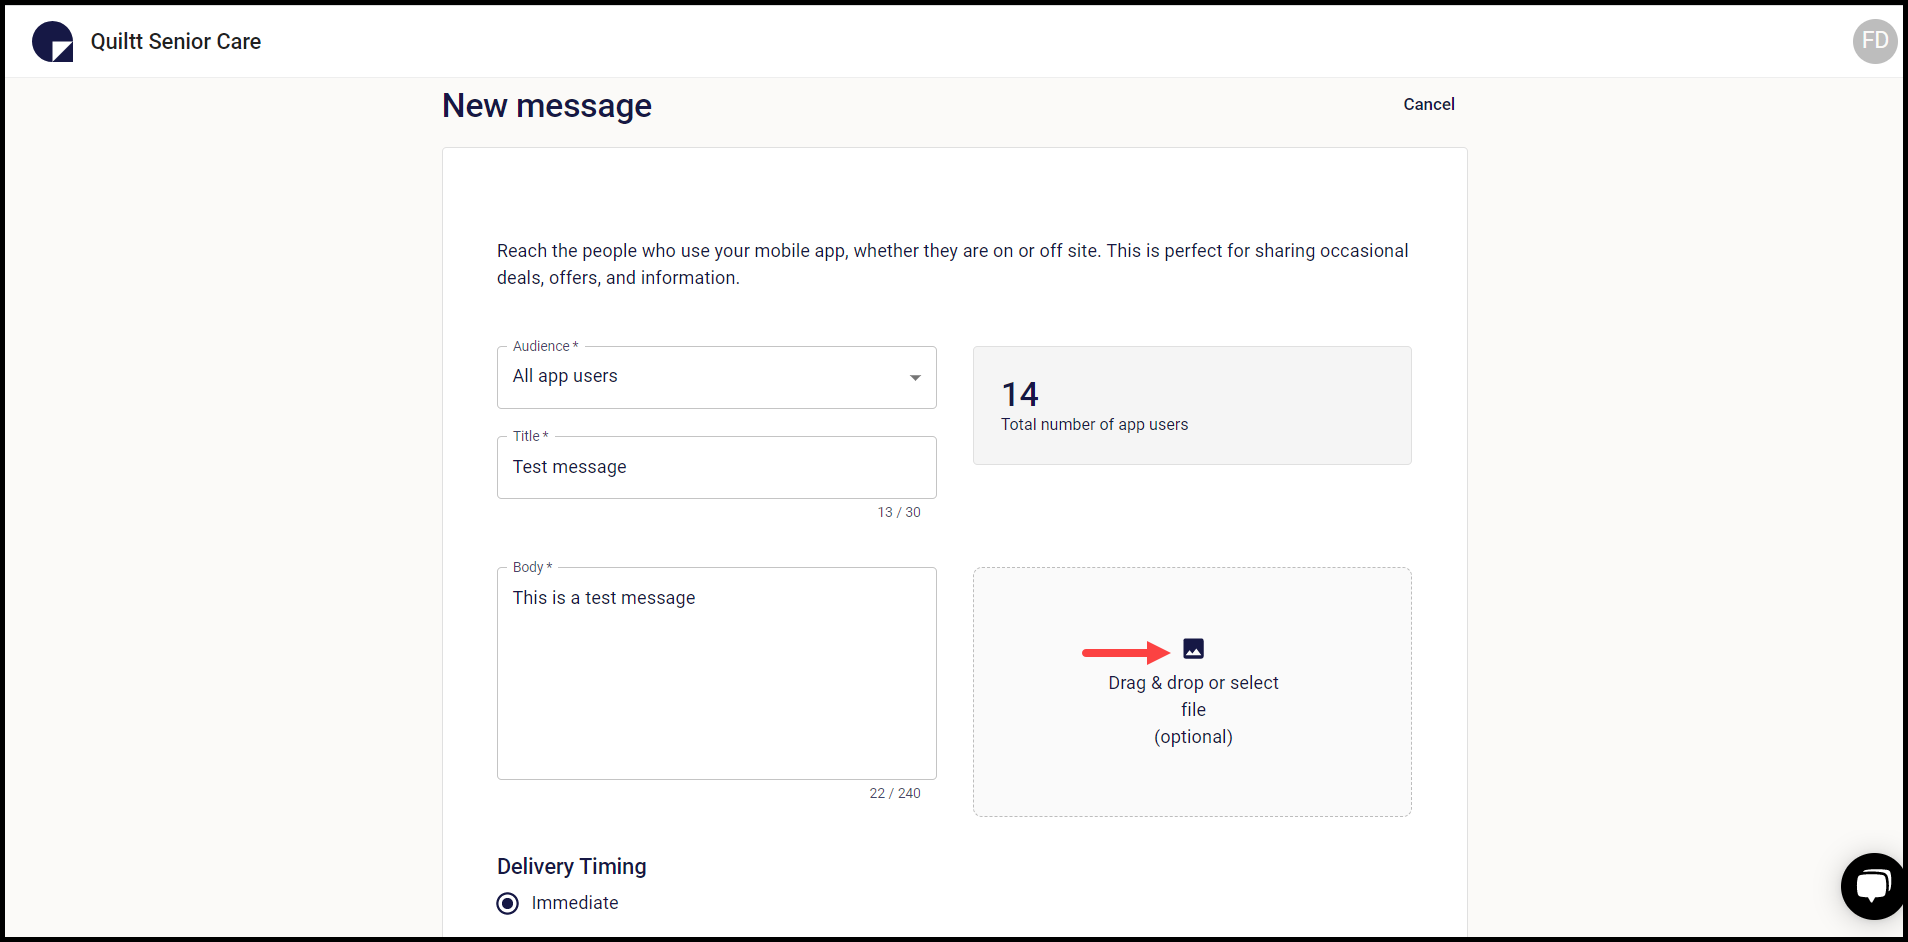
2. To add a message, click the Add a Message button. This takes you to the New Message screen.
3. Select the audience for the message using the Audience dropdown.
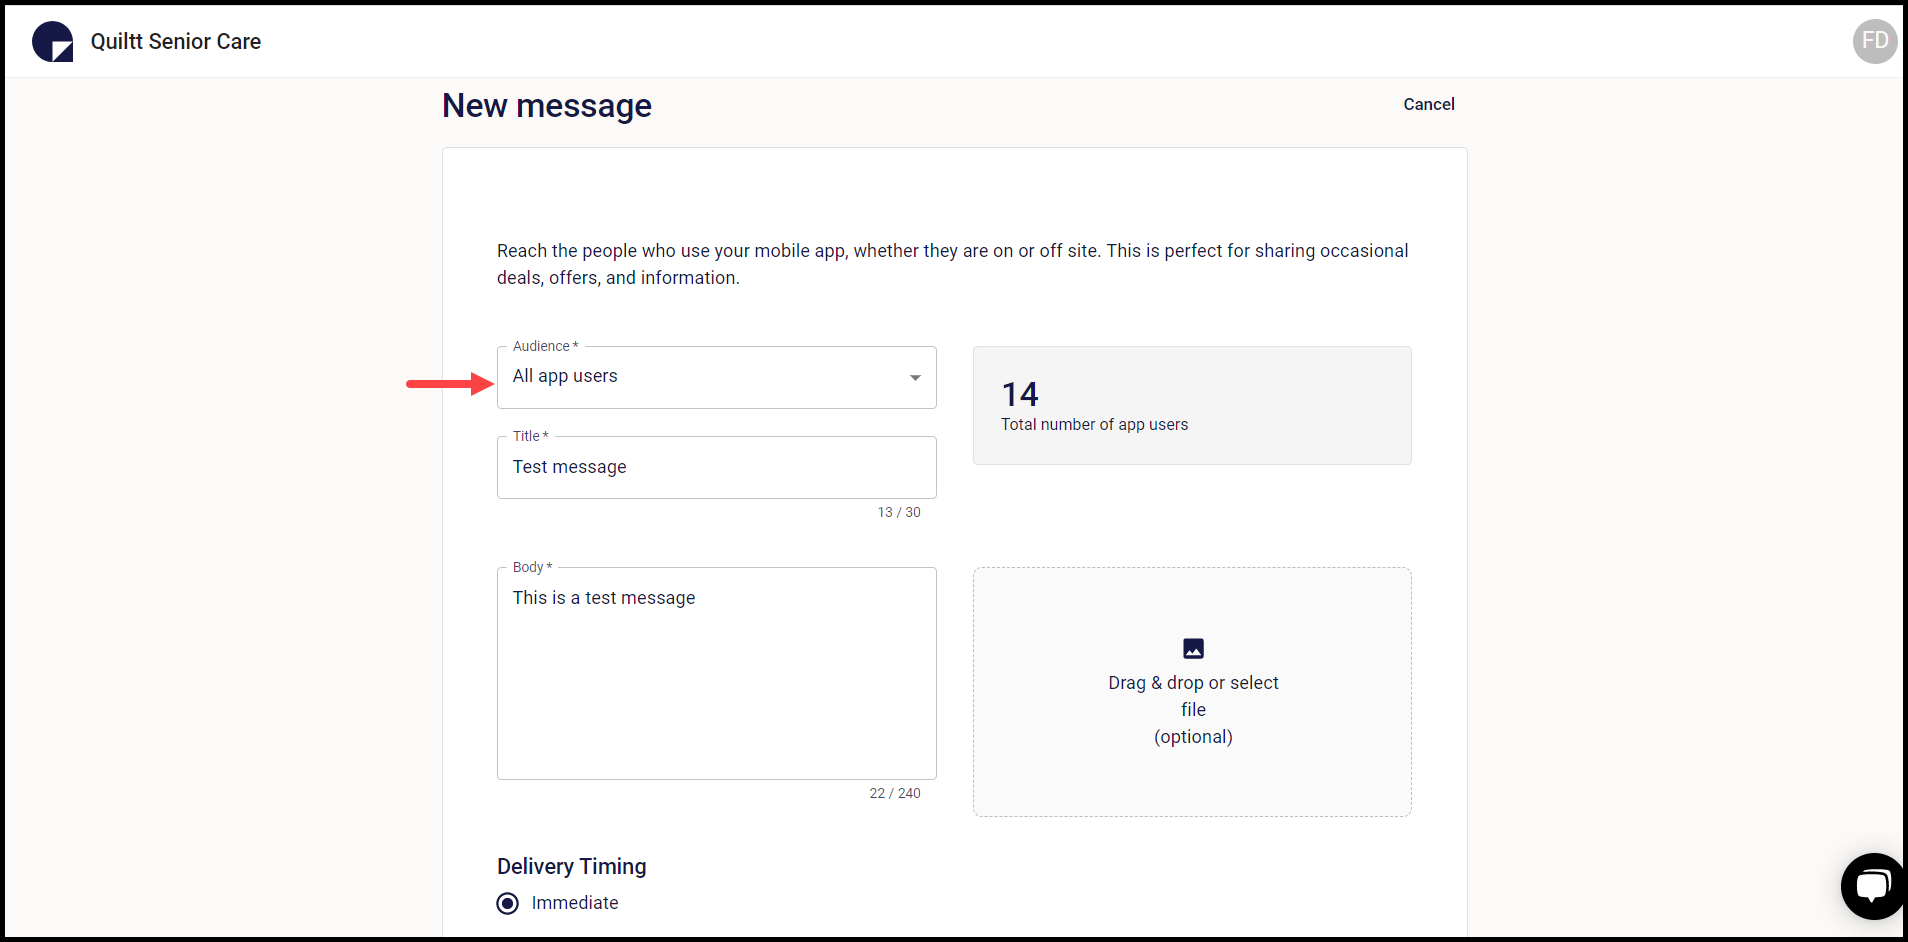
4. Enter the title of the message in the Title field.

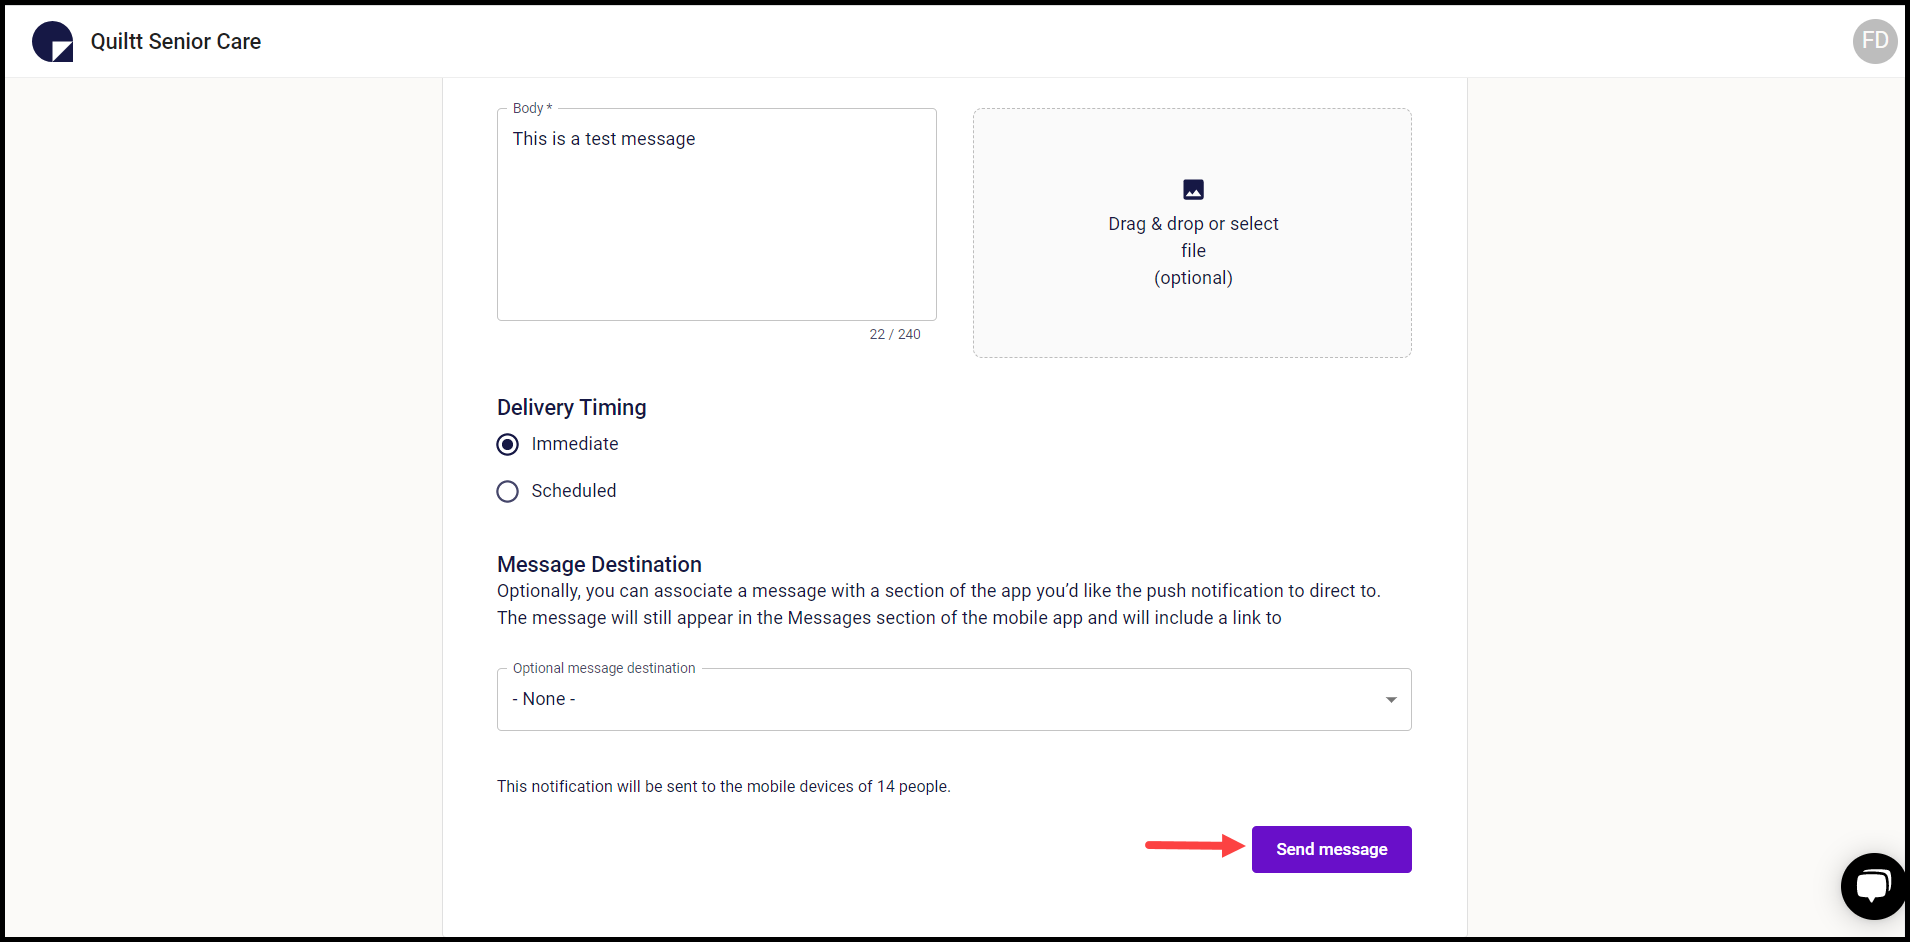
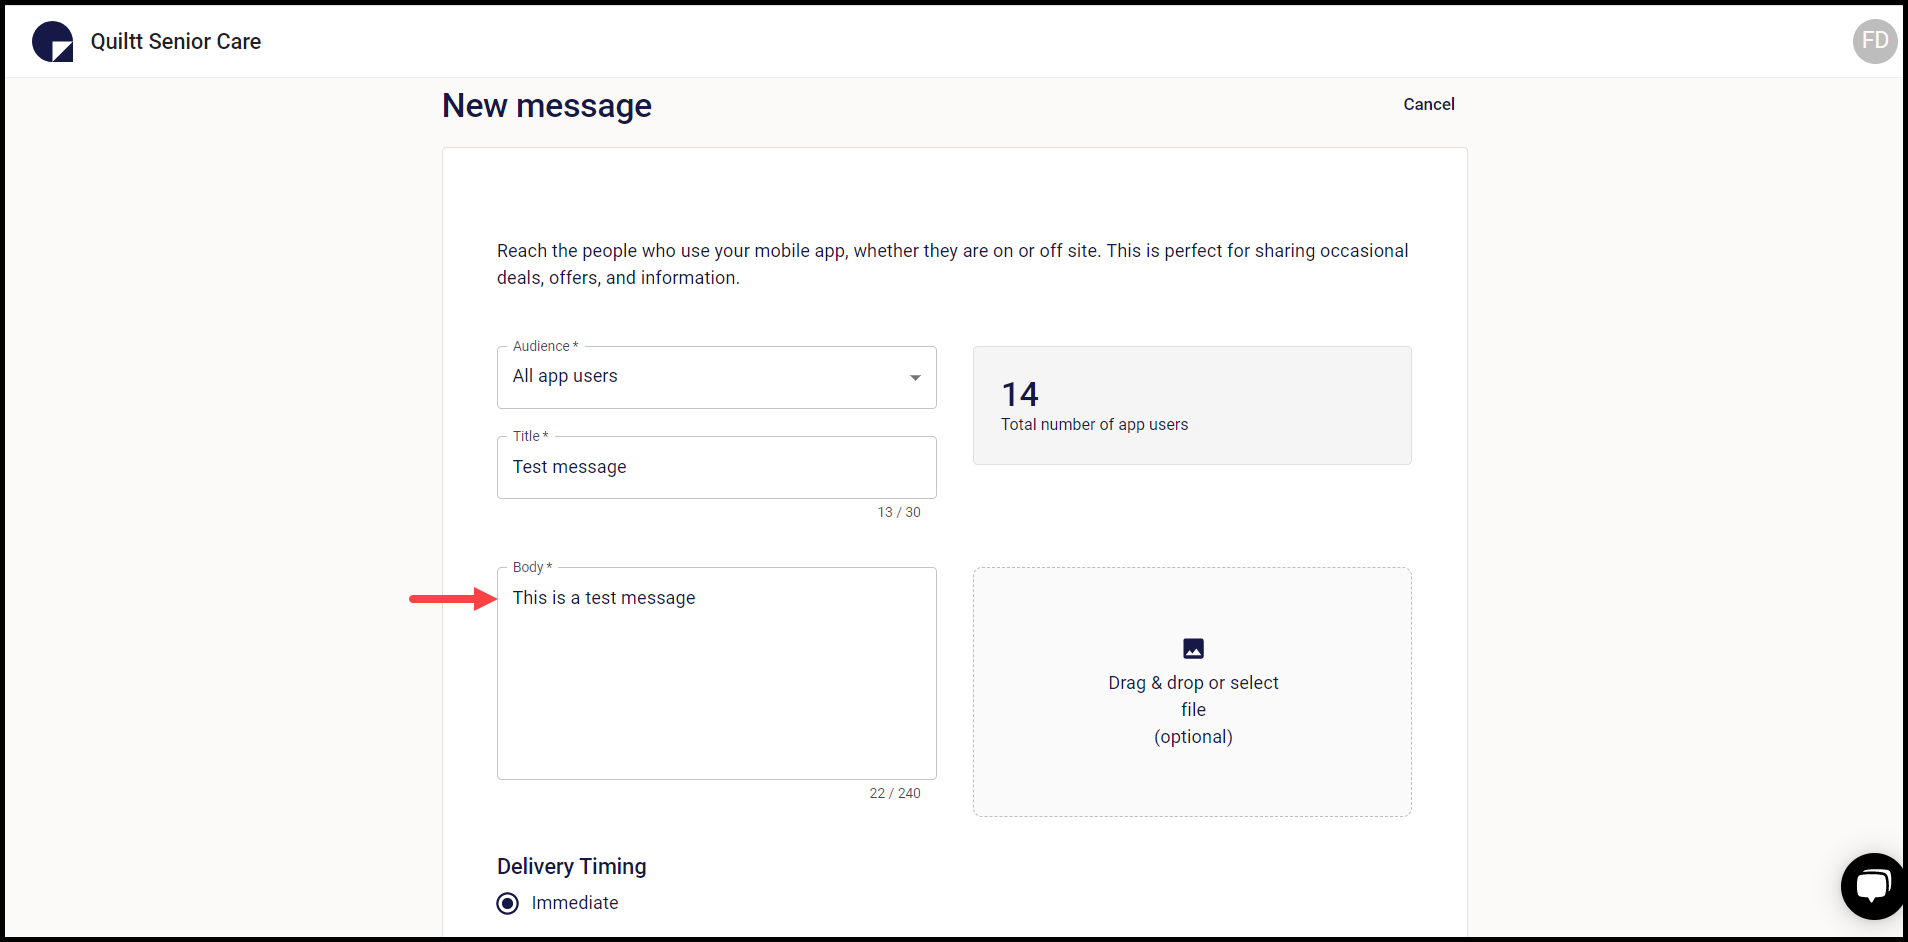
5. Enter a description for the message in the Body field.
6. Attach any required files in the message using the Drag & drop or select file section.
7. Select the message delivery timing from the Delivery Timing heading.
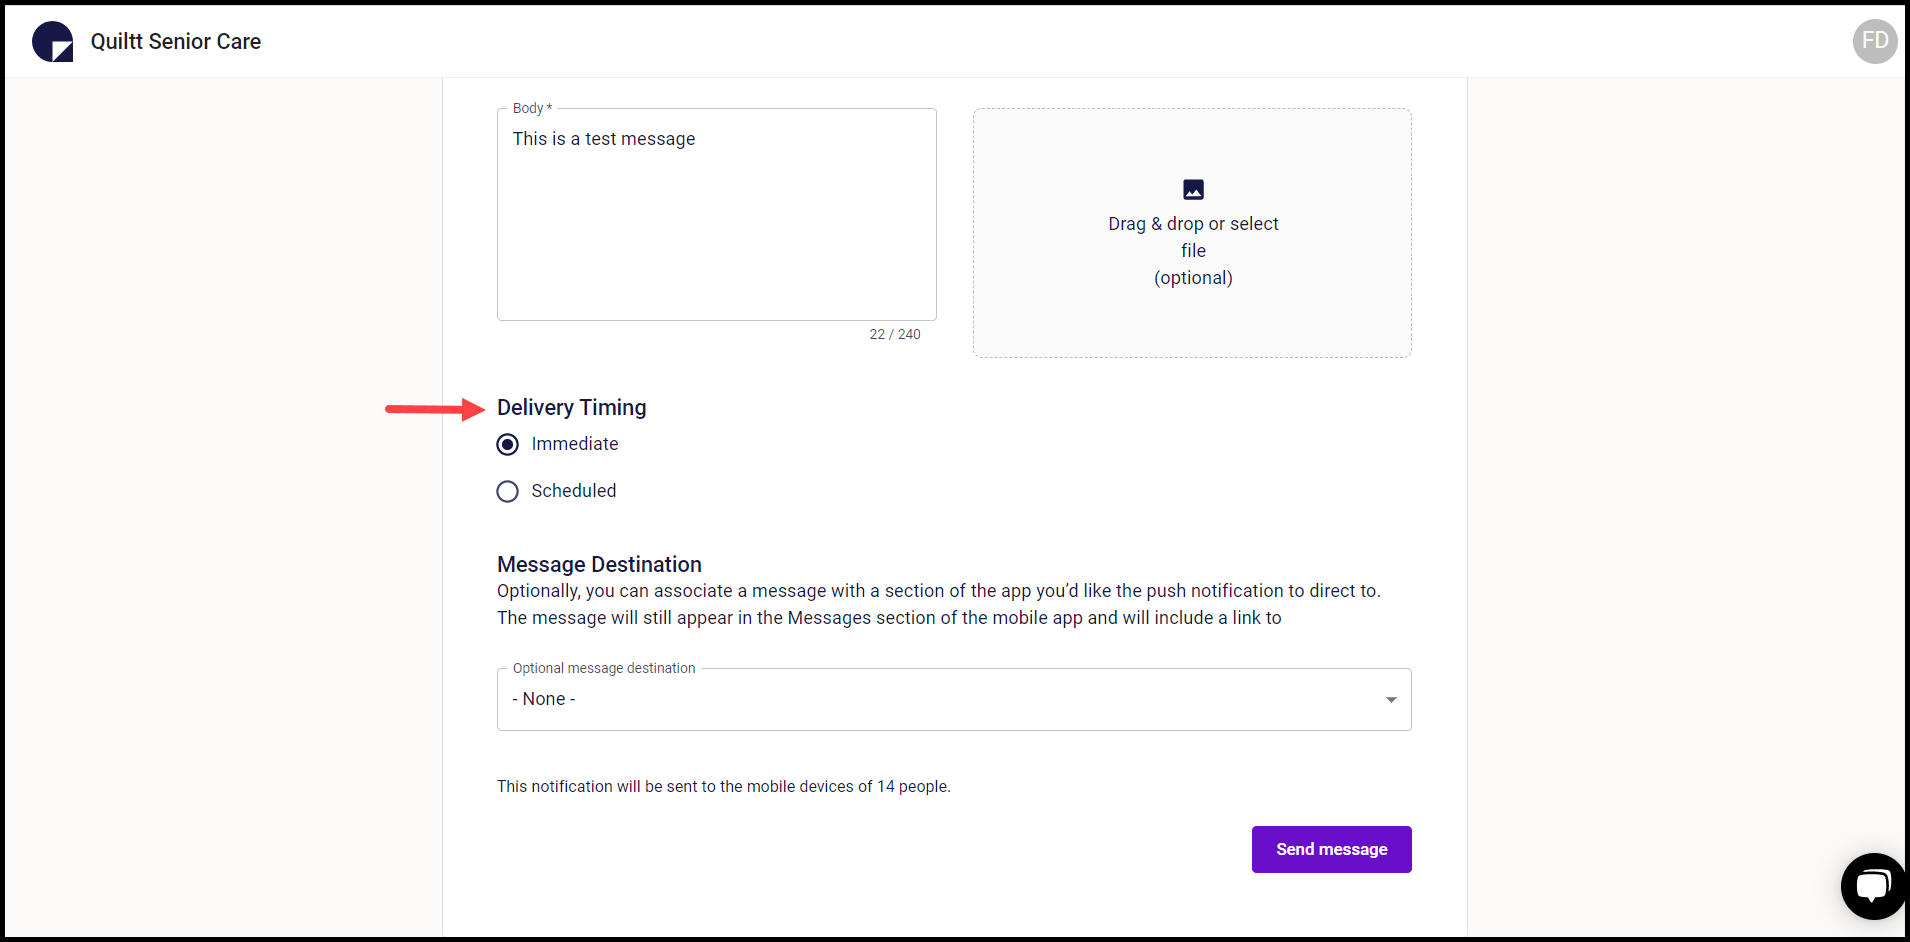
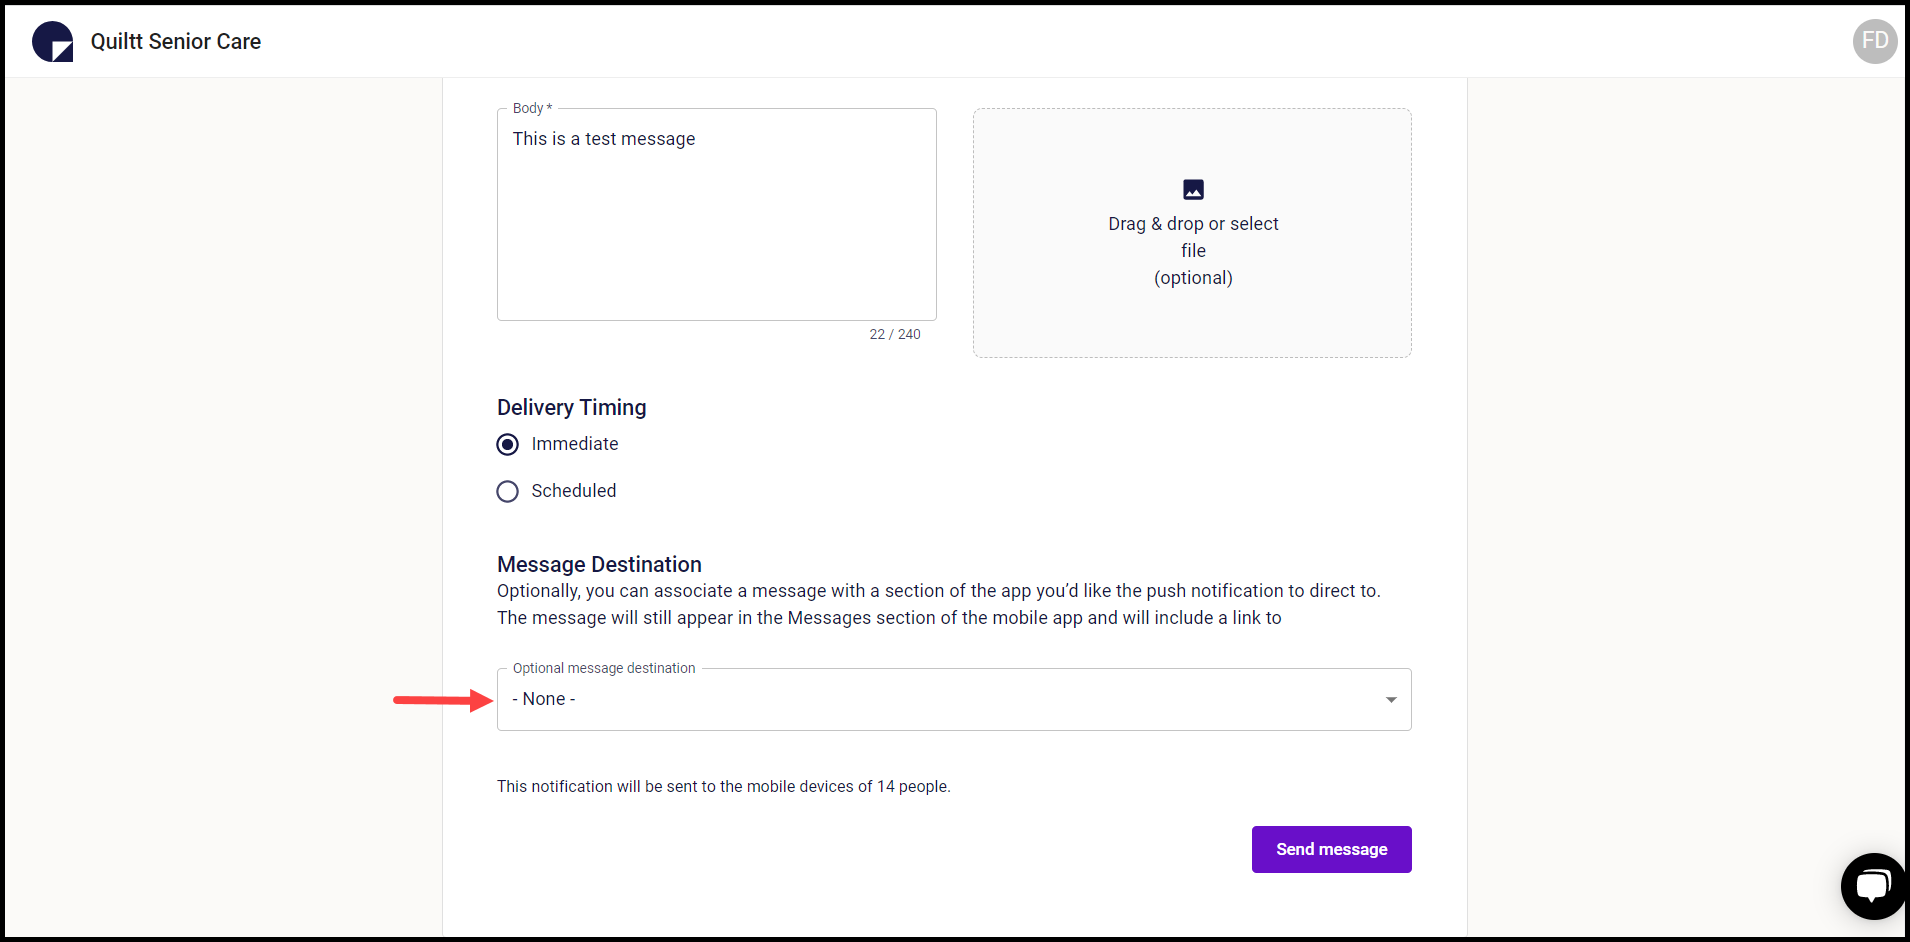
8. Select the additional message destination using the Optional Message Destination dropdown.
9. Once the required fields are filled, click the Send Message button.